안녕하세요. ^^ 고품질 IT 설명꾼 컴알못(컴알모옷) 입니다.
오늘 포스팅할 내용은
듀얼모니터, MST HUB, 트리픎니터, 쿼드모니터, 주식모니터 설치방법에 대해서 포스팅 하겠습니다. 바쁘시거나 글 읽는것 싫어 하시는 분들은 굵은 글씨와 그림만 보셔도 따라하실 수 있습니다.

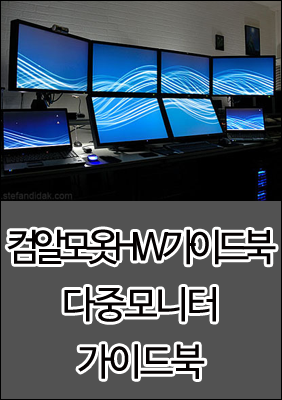
출처 : https://www.stocktrader.com/2008/10/30/the-dream-multi-monitor-trading-station
다들 "듀얼 모니터 (dual monitor)이상 필요 있어?" 라고 말을 하는데 저의생각은 최소 4대는 있어야 한다고 생각하는 사람입니다. 듀얼 모니터는 너무 적어요 ㅠ.ㅠ

중앙,상단에 가장 넓은 21:9 모니터 (작업용, 엑셀, 동영상 편집, 이미지 작업)
좌우측에 세로형 피벗 (인터넷 및 문서 참조용 (한글 및 세로 ppt)
*. 주의 사항 : 중앙아래에 있는 21:9 모니터를 첫번째 그림처럼 약간 눕혀서
세팅하는것이 좋습니다. (목 아파서 위에 있는 21:9 모니터는 잘 안 쓰게 됩니다.)
*. 주의 사항 : 모니터암을 사용할 때 주의점
1. 책상에 유리가 있는 경우에는 설치를 조심해야 한다.(무게, 깨짐)
2. 모니터암은 벽이나 파티션에 설치 하는 모델보다는 컴퓨터에 설치하는 모델을 구매한다. (세팅하기에 용이함)
출처 : 카멜 마운트 (개인적으로 이 회사 제품이 가격대비 상품이 괜찮은것 같음)
이렇게 사용을 권하는 이유는 직장 생활을 하다보면 처음에는 문서 하나를 만드는데도 몇시간이 걸립니다. 회사 양식도 맞춰야 하고 개요나 목차 하나를 쓰는데도 엄청나게 많은 시간이 듭니다.

하지만 직장생활을 2~3년 하다보면 문서가 많이 쌓입니다. 노하우가 많이 쌓이는 것도 있지만 결론적으로 기존에 작성했던 것을 참조해서 작업을 하다보면
예전에는 몇시간 걸리던 일이 지금은 몇분이면 끝납니다. 이것을 alt + tab 눌러가면서 하나 하나 복사해서 사용하시겠습니까?

출처 : http://www.stefandidak.com/office/
아니면 창을 2개로 나눠서 스크롤 내려가면서 작업 하시겠습니까?
듀얼 모니터 , 트리플 모니터, 쿼드 모니터 , 다중 모니터는 이제 선택이 아닌 필수 입니다.
사설이 길었습니다. 이제 본론으로 들어가서
컴퓨터 하나에 모니터 여러대 세팅에 대한 포스팅을 본격적으로 진행하겠습니다.
총 9가지 방법이 있습니다. 가장 쉬운것 부터 어려운것 까지 우리 컴알못(컴알모옷)들을 위해서 설명해 드리겠습니다.
순서를 쉬운 방법, 금액이 덜 들어가는 방법, 컴퓨터에 부담이 적은 순서를 감안해서 순번을 정했습니다.

1. 그래픽 카드 1개 사용 (슬롯 확인)
지금 사용하고 있는 그래픽 카드를 확인해 보시면 된다.

최근에 나온 가격대 성능비 괴물 그래픽카드 1660ti 입니다.. dp1.4, hdmi2.0 dvi-d 가 있어 총 3대의 모니터와 연결이 가능합니다.

2. 그래픽카드 2개 이상(여러대) 사용
(메인보드에 PCI_Express 슬롯이 몇개 인지 확인)
용어 정리 부터 하겠습니다. 요즘 나오는 그래픽 카드는
99.9%가 pci_e x 16 슬롯에 설치 합니다.

출처 : https://www.magewell.com/blog/2/detail
총 3가지 pci 슬롯이 있습니다.
pci-e x 1
pci-e 3.0 x 16
pci-e 2.0 x 16 (3.0이 더 좋은것입니다. 요즘 나오는 것들은 대부분 3.0 )
(*. x 4 , x 8 다른것도 있으나 모르셔도 됩니다.)

위 그림을 보면 pci x 16 슬롯이 3개라서 그래픽 카드를 3개 까지 설치 할수 있습니다.
*. 주의할점 : 그래픽 카드를 여러개 설치할 경우 가급적 동일한 제품으로 설치 할것을 권합니다. 예를 들어 Radeon과 nvidia를 동시에 사용하면 드라이버 충돌등의 문제가 발생할 수 도 있으므로 브랜드와 기종까지 동일 제품을 사용하시는 것이 좋습니다.

3. 젠더 이용 그래픽 카드 연결 사용 (pci-e x 1 -> x 16 젠더)


위 그림과 같이 메인보드에 작은 pci-e x 1 슬롯이 있습니다 이것을 큰 pci-e x16 슬롯으로 변경해주는 젠더가 있습니다. (pcie x 1 젠더 라고 검색하시면 됩니다.) 이것을 이용해서 추가로 그래픽 카드를 더 연결할 수도 있습니다.
*. 비트코인 광풍일때 한참 유행한 연결 방식 입니다.

4. 내장 / 외장 그래픽 카드 동시 사용

이건 BIOS 라고 컴퓨터 부팅시 f2, f4, f8, f10, del 키중 하나를 누르면 처음보는 메뉴가 뜰것입니다.
여기서 세팅을 해야 합니다. 메인보드 마다 설정 방법이 다 달라서 통일되게 알려 드리긴 어렵지만 대략적으로 BIOS 들어간 후
칩셋(Chipset), 그래픽(Graphic) 같은곳을 찾아서 들어간후 (방향키로 이동, 엔터 확인 및 변경)
advanced chipset feature -> auto를 -> onboard vga로 변경
internal Graphics를 -> Enabled 로 변경
Integrated Graphics Configuration -> IGD Multi-Monitor를 -> Enabled으로 변경
하시면 됩니다. (보통은 이 3개 옵션중 하나 입니다.)
구글에서 메인보드명 + 내장그래픽 설정 이라고 검색하시면 더 많은 정보를 알 수 있습니다.
단점은 내장 그래픽을 쓰면 램을 잡아 먹어서 느려집니다.

5. mst hub , 데이지 체인(Daisy chain) , dp out 모니터 활용

MST Hub
DP 단자의 경우 dp 1대를 최대 4대 까지 늘려 주는 mst hub 라는 것이 존재 합니다.
물론 모니터가 dp 단자를 지원 해야 합니다.
단 지원하지 않아도 dp to hdmi dp to dvi 등을 활용해도 되지만 액티브 컨버터(Active)를 꼭 사용해야 정상적으로 출력이 가능합니다.
* 주의할점 : mst hub를 사용하면 각 모니터별 최대 해상도는 달라지니 참조 하시기 바랍니다. 4개 연결하면 1920 x 1080 3개 연결하면 2560 x 1440 이런식으로요.

출처 : 삼성모니터
데이지체인 Daisy Chain (Dp-Out)
모니터에 dp out 슬롯이 있어 다른 모니터로 연결이 가능한 슬롯(위 그림 참조)

6. usb 그래픽 카드

usb3.1 (gen1, gen2) 정도의 대역폭의 usb 그래픽 카드는 생각보다 쓸만할것 같은데 한번도 본적이 없습니다. 이 방식으로 고사양 게임을 하는것이 아니라면 충분히 쓸만한 방식입니다.

7. 태블릿을 모니터로 활용 (투몬 usb)

출처 : http://www.easynlight.com/twomonusb/
간단합니다. 본인이 보유하고 있는 안드라이드 태블릿이나 , 아이패드등에 투몬 usb를 설치해서 듀얼 모니터로 사용하는 것입니다. 속도는 투몬air는 와이파이로 하는것인데 너무 느려서 투몬usb로 사용했습니다. 다른 어플 인스톨 하지 마시고 투몬 설치 하세요. 3개 다른 프로그램하고 비교해도 투몬이 좋았습니다. 속도는...음...빠르진 않습니다.

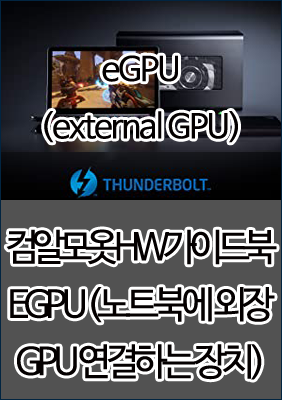
8. egpu (썬더볼트 외장형 그래픽 카드)
노트북에 썬더볼트 케이블이 있고 모니터를 여러대 사용하고 싶으신 분이 있다면 충분히 좋은 솔루션입니다.

그림만 보셔도 이해가 되실것입니다. 단점은 원래 성능의 몇 %만 정도만 성능 발휘가 됩니다. 그리고 egpu 가격이 비싼편입니다.

9. 매트록스 Triplehead2go 이용 (Dualhead2go)

출처 : Matrox
한 5~6년 전에 구매 해서 사용했던 모델인데 dvi 1개를 3대로 늘려주는 방식이습니다. (가격이 상당히 비쌉니다)
요즘에는 dp 포트를 mst hub를 이용해서 사용하는 해주는 모델이 나왔는데 이게 필요할까? 라는 생각이 들긴 합니다.
여기까지 다중 모니터를 설치하는 방법이였습니다.
더 궁금한게 있으신 분들은 댓글로 남겨 주세요.^^

'컴퓨터 조립 & 하드웨어 > 다. (다중)모니터' 카테고리의 다른 글
| 모니터 주사율이란? 주사율 강제 변경 방법 (0) | 2020.12.04 |
|---|---|
| 안쓰는 노트북 듀얼모니터로 사용하기 (4) | 2019.08.25 |
| [컴알못_컴알모옷]D-sub , DVI, HDMI, DP 모니터 케이블 종류 (36) | 2019.05.10 |
| [컴알못_컴알모옷]듀얼모니터, 트리플모니터 그래픽카드 (6) | 2019.05.04 |
| [컴알못_컴알모옷]듀얼모니터, 다중디스플레이 초보 설정 (6) | 2019.05.03 |