안녕하세요. ^^ 고품질 IT 블로거 #컴알못( #컴알모옷)입니다. 포스팅할 내용은 모니터 주사율 정의 및 주사율 (강제) 변경 방법에 대해서입니다. 바쁘시거나 글 읽는 것 싫어하시는 분들은 굵은 글씨와 그림만 보셔도 따라 하실 수 있습니다.
| 최종 글 작성일 / 수정일 : 2020년 12월 30일(금) | |
| 포스팅에 사용한 OS Version | 포스팅에 사용한 OS 종류 |
|
 버전 확인 방법: win키+R키->winver->확인 |
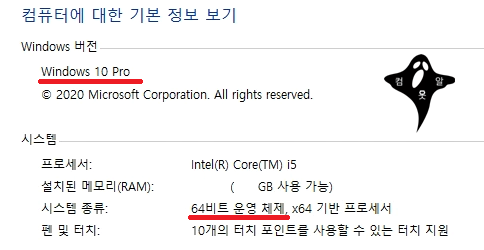 종류 확인 방법: win키+PauseBreak키 |
|
Windows 10 Pro 64비트 2004버전 |
|
"애드센스, 파트너스 활동을 통해 일정액의 수수료를 제공받을 수 있음"
"윈도우 및 각종 프로그램 버전에 따라 포스팅과 내용이 다를 수 있음"
1. 모니터 주사율이란?
1초에 얼마나 많은 장면을 표시할 수 있는지 나타내는 수치입니다.
말이 어렵다면 간단하게 동영상을 보시면 이해가 빠르실 것입니다.
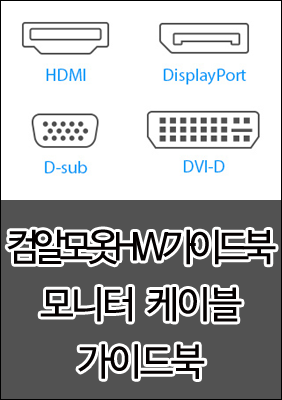
*. 참고로 144hz 이상을 지원하려면 DVI(듀얼링크), DP(Display Port), HDMI 2.0 이상의 케이블을 사용하셔야 합니다.
[컴알못_컴알모옷]D-sub , DVI, HDMI, DP 모니터 케이블 종류
안녕하세요. ^^ 고품질 IT 설명꾼 컴알못(컴알모옷) 입니다. 오늘 포스팅할 내용은 D-sub, DVI, Hdmi, dp 케이블에 대해서 포스팅 하겠습니다. 바쁘시거나 글 읽는것 싫어 하시는 분들은 굵은 글씨와
tks9567.tistory.com
최근 출시하고 있는 모니터는 60Hz ~ 360Hz까지 다양하며 보통 게이밍 모니터라고 하면 144Hz 이상을 말합니다. FPS게임에서는 중요한 요소입니다. 물론 주사율이 높은 모니터를 활용하려면 PC 성능이 따라줘야 하므로 CPU 및 GPU(그래픽카드)도 고성능 이어야 합니다.
#모니터주사율

2. 모니터 주사율 (강제) 변경 방법
모니터 주사율 (강제) 변경 방법에는 크게 3가지 방법이 있습니다.
가. 윈도우 자체 기능을 이용하는 방법
나. NVIDIA 제어판을 사용하는 방법 (NVIDIA 제품을 사용할 경우)
다. RADEON 설정을 사용하는 방법 (AMD 제품을 사용할 경우)
#주사율강제변경
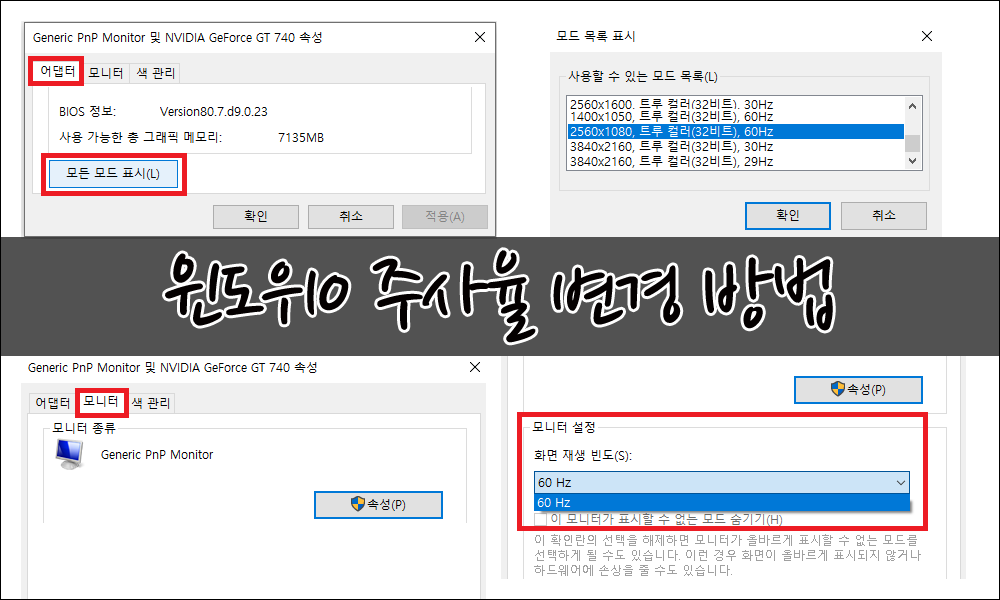
가. 윈도우 자체 기능을 이용하는 방법
바탕화면에서 마우스 우클릭 -> 디스플레이 설정 -> 디스플레이 -> 고급 디스플레이 설정 -> 디스플레이 선택(다중 모니터일 경우) -> 디스플레이 X의 어댑터 속성을 표시
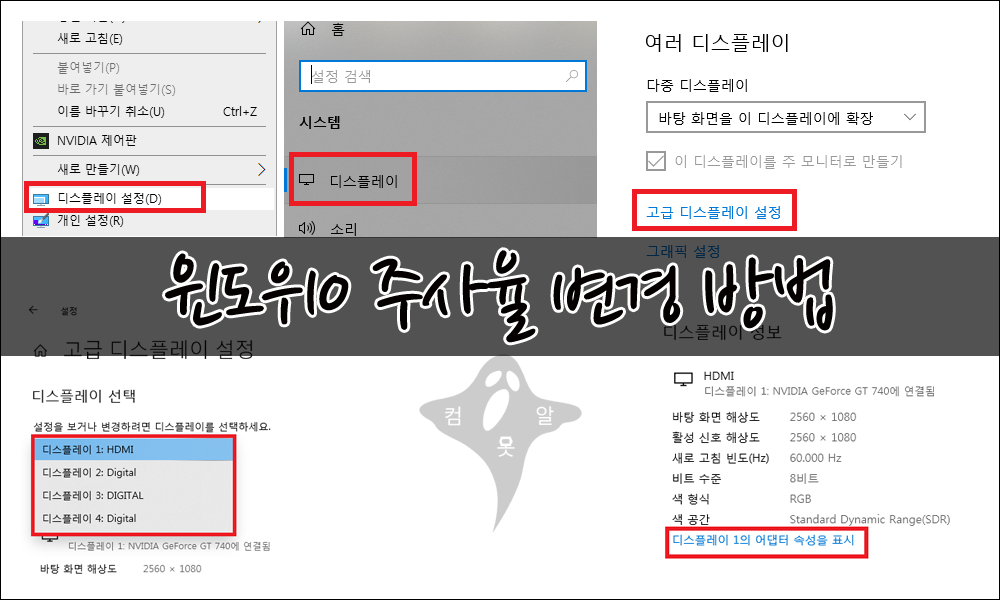
-> 어댑터 -> 모든 모드 표시 OR 모니터 -> 화면 재생 빈도
-> 설정 변경 후 확인
윈도우 7 순정 다운로드
안녕하세요. ^^ 고품질 IT 블로거 #컴알못( #컴 알모 옷)입니다. 포스팅할 내용은 윈도우7 순정 다운로드 방법에 대해서입니다. 바쁘시거나 글 읽는 것 싫어하시는 분들은 굵은 글씨와 그림만 보
tks9567.tistory.com
나. NVIDIA 제어판을 사용하는 방법
일반 변경 : 바탕화면에서 마우스 우클릭 -> NVIDIA 제어판 -> 디스플레이 선택(다중 모니터일 경우) -> 해상도 변경 -> 재생 빈도 변경 -> 적용
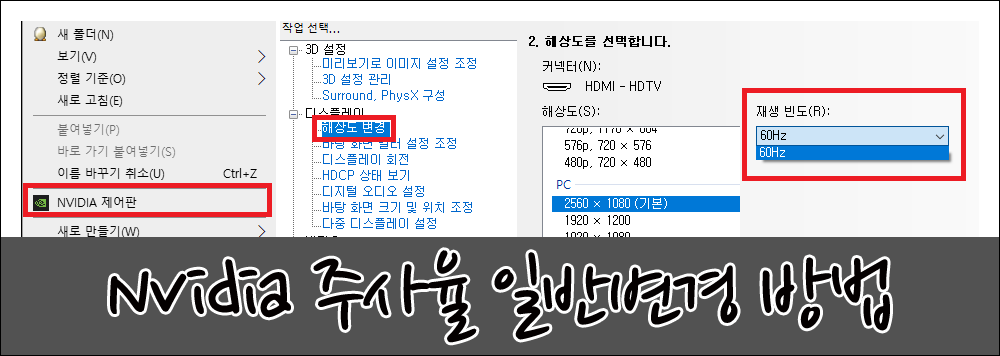
강제 변경 : 바탕화면에서 마우스 우클릭 -> NVIDIA 제어판 -> 디스플레이 선택(다중 모니터일 경우) -> 사용자 정의 -> 디스플레이가 노출하지 않는 해상도 활성화 체크 -> 사용자 정의 해상도 만들기 -> 동의 -> 디스플레이 모드 해상도 / 재생 빈도 / 스캔 유형 변경 -> 테스트 - > 현재 해상도를 저장하시겠습니까? 예 -> 오버 클럭 성공


완료 후 윈도우 주사율 설정으로 들어가서 변경

*. 문제 : 사용자 정의가 비활성화 / 해결방법 : 다른 해상도로 변경 후 다시 시도하면 정삭적으로 활성화 가능
*. 질문 : 모니터 주사율을 강제로 높이면 문제가 발생? / 해답 : 수명이 줄어들 수는 있겠지만 문제는 없음. (오버클럭)
*. 문제 : 마우스 우클릭 시 NVIDIA 제어판이 없음 / 해답 : 아래 링크에서 다운로드하여서 (재)설치
NVIDIA 드라이버 다운로드
www.nvidia.co.kr
*. 문제 : 마우스 우클릭시 NVIDIA 제어판이 설치는 되어 있으나 비활성화나 실행이 불가능함. / 해답 : 제어판 -> 프로그램 및 기능 => NVIDIA 삭제 후 재설치
*. 질문 : 프로그레시브 , 인터레이스는 먼가요?
대답 : 인터레이스 - 2필드가 하나로 합쳐져(가로 열 짝수 라인, 홀수 라인) 하나의 프레임 구성 (고화질에 불리, 깜빡거림 없음)
대답 : 프로그레시브 - 완전한 한 장의 프레임을 연속적으로 보여줌 (고화질에 유리, 깜빡거림 현상)
#NVIDIA제어판
[컴알모옷]윈도우 구매 가이드 (윈도우 가격이 싼 이유, 저렴한 이유)
안녕하세요. ^^ 고품질 IT 블로거 #컴알못( #컴알모옷 ) 입니다. 포스팅할 내용은 윈도우 가격이 싼 이유와 윈도우 구매 방법 설정 방법에 대해서 입니다.바쁘시거나 글 읽는것 싫어 하시는 분들
tks9567.tistory.com
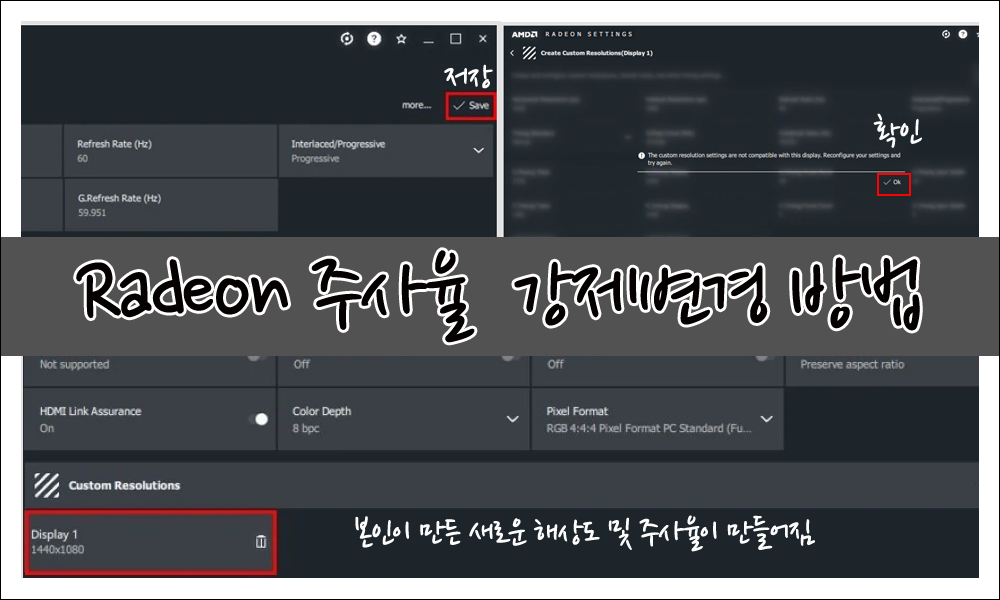
다. RADEON 설정을 사용하는 방법
일반 변경 : 바탕화면에서 마우스 우클릭 -> Radeon 설정 or Radeon Pro 설정 -> 디스플레이 -> 디스플레이 선택(다중 모니터일 경우) -> 사양 -> 전역 재생 빈도 변경 -> 적용

강제 변경 : 바탕화면에서 마우스 우클릭 -> Radeon 설정 or Radeon Pro 설정 -> 디스플레이 -> 디스플레이 선택(다중 모니터일 경우) -> 사용자 지정 해상도 옆 만들기 클릭 -> 해상도 및 전역 재생 빈도(주사율) 변경 -> 저장 -> 확인 -> 본인이 만든 새로운 해상도 및 주사율이 만들어짐

완료 후 윈도우 주사율 설정으로 들어가서 변경

컴알모옷 안쓰는 구형 노트북 윈도우(oem, dsp) 다른 PC로 옮기기
안녕하세요. ^^ 고품질 IT 블로거 #컴알못( #컴알모옷) 입니다. 포스팅할 내용은 사용 안하는 구형 노트북이나 PC의 윈도우를 다른 PC로 옮기는 방법에 대해서입니다. 바쁘시거나 글 읽는 것 싫어��
tks9567.tistory.com

'컴퓨터 조립 & 하드웨어 > 다. (다중)모니터' 카테고리의 다른 글
| (듀얼) 모니터 신호 없음 해결 방법 (21) | 2020.12.12 |
|---|---|
| IPS패널 , VA패널, TN패널, AHVA패널, PLS패널, ADS패널 패널 총 정리 (0) | 2020.12.06 |
| 안쓰는 노트북 듀얼모니터로 사용하기 (4) | 2019.08.25 |
| [컴알못_컴알모옷]듀얼 모니터 MST hub 트리플 모니터 쿼드 모니터 주식 모니터 (73) | 2019.05.15 |
| [컴알못_컴알모옷]D-sub , DVI, HDMI, DP 모니터 케이블 종류 (36) | 2019.05.10 |